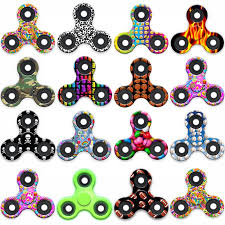
How to Make a DIY Hand Spinner
Got your new fidget spinner yet?
Fidget spinners are the new fad of 2017. Not only do they have their fair share of benefits, but they are also ideal if you are looking for some simple entertainment. A proven stress-reliever, a fidget spinner can help you channel all your anxiety and restlessness into the motion of your hands. Hand spinners also lead to sharper concentration and focus.
So with a fidget spinner, it is all about positives. However, if you want to try one out before buying one, you can make your own. It is not at all difficult, and let us tell you the easiest steps to follow to make a DIY fidget spinner. Plus, having your own custom fidget spinner isn't really a bad idea, is it?
Steps to Make a DIY Hand Spinner:
The method is simple, but you need to devote some of your time if you do not want the procedure to go wrong.
Things you will need:
All you will need are skateboard bearings and super glue. Using rubber bands is optional. You should have a minimum of 7 skateboard bearings at your disposal. So let us start off with the method.
Steps to follow:
We will help you make your own diy hand spinner that is as good as any hand spinner toy. Here is how you can go about it.
• Removing the Center Cap:
You should first remove the metal cap off the one centre bearing so as to minimise friction between it and your fingers. This will enable your spinner to spin longer, which is definitely something you would want. Just use a knife or any sharp tool to slightly lift the cap of the bearing by gently inserting it underneath. You do not need to put in much effort, as the cap will be pushed off easily. Repeat this for the other side of the bearing. In case you are creating more than fidget spinner, you have to do this for all of them individually.
• Gluing the bearings:
After finishing the above mentioned process, it is now your turn to glue the rest of the bearings to the centre bearing. How to do that? Let us elaborate.
For your first spinner, which will consist of 3 bearings, lay out the skeleton first. The structure should be flat when you put a bearing on each side of the centre bearing. Once you have lined them up, carefully use super glue at the connecting points.
When that dries up, lift the bearings vertically and repeat the application of glue. After you are done applying glue to all four surfaces, use a rubber band to give the spinner some extra support and also an additional dash of colour.
If you are looking to make a second spinner using 4 bearings, then you should follow the above mentioned process itself. Just be careful that the spinner is well-balanced and the bearings places at equal lengths. Put 6 bearings around the centre one, and then remove alternate ones to get the perfect shape. Apply the glue in a similar manner as before.

It's time for some fun!
Now you have two fidget spinners, or hand spinners as we call them, all ready to be played with. Invoke your inner child and indulge in some lazy time with your very own hand made spinner.


Comments
Post a Comment